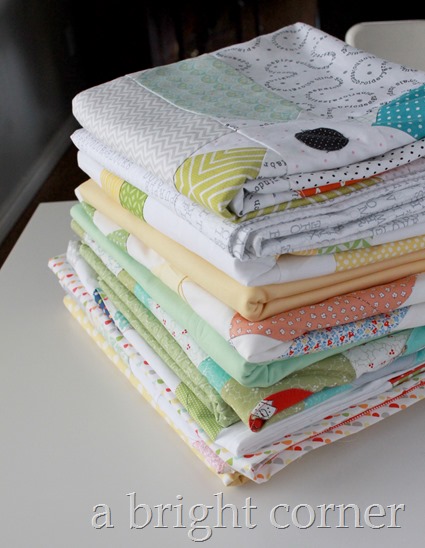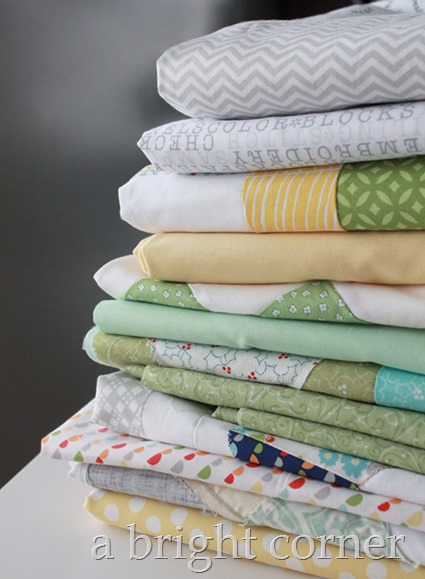

Showing posts with label misc. Show all posts

Friday, January 22, 2016

Five Friday Favorites: Sewing Room Inspiration

Five Friday Favorites

I love seeing where other people create.  So this week's Five Friday Favorites include 5 sewing room photos that I find inspiring.

First I have to say that I'm hoping to keep things real here.  Let's be honest.  We'd all love a magazine-cover-worthy sewing space.  But we can't all have that.  We find a spot in our home that we can carve out for ourselves.  And then we make it pretty.  And pretty functional too, right?

For many years I shared a room (small!) with the family computer.  And before that, my sewing space was in the closet of the spare bedroom.  I built myself a special table that would fit inside and allow the closet doors to close, but tall enough for me to sew at.  It worked.  I made the best of what I had.  It was similar to this, although waaay less cute.
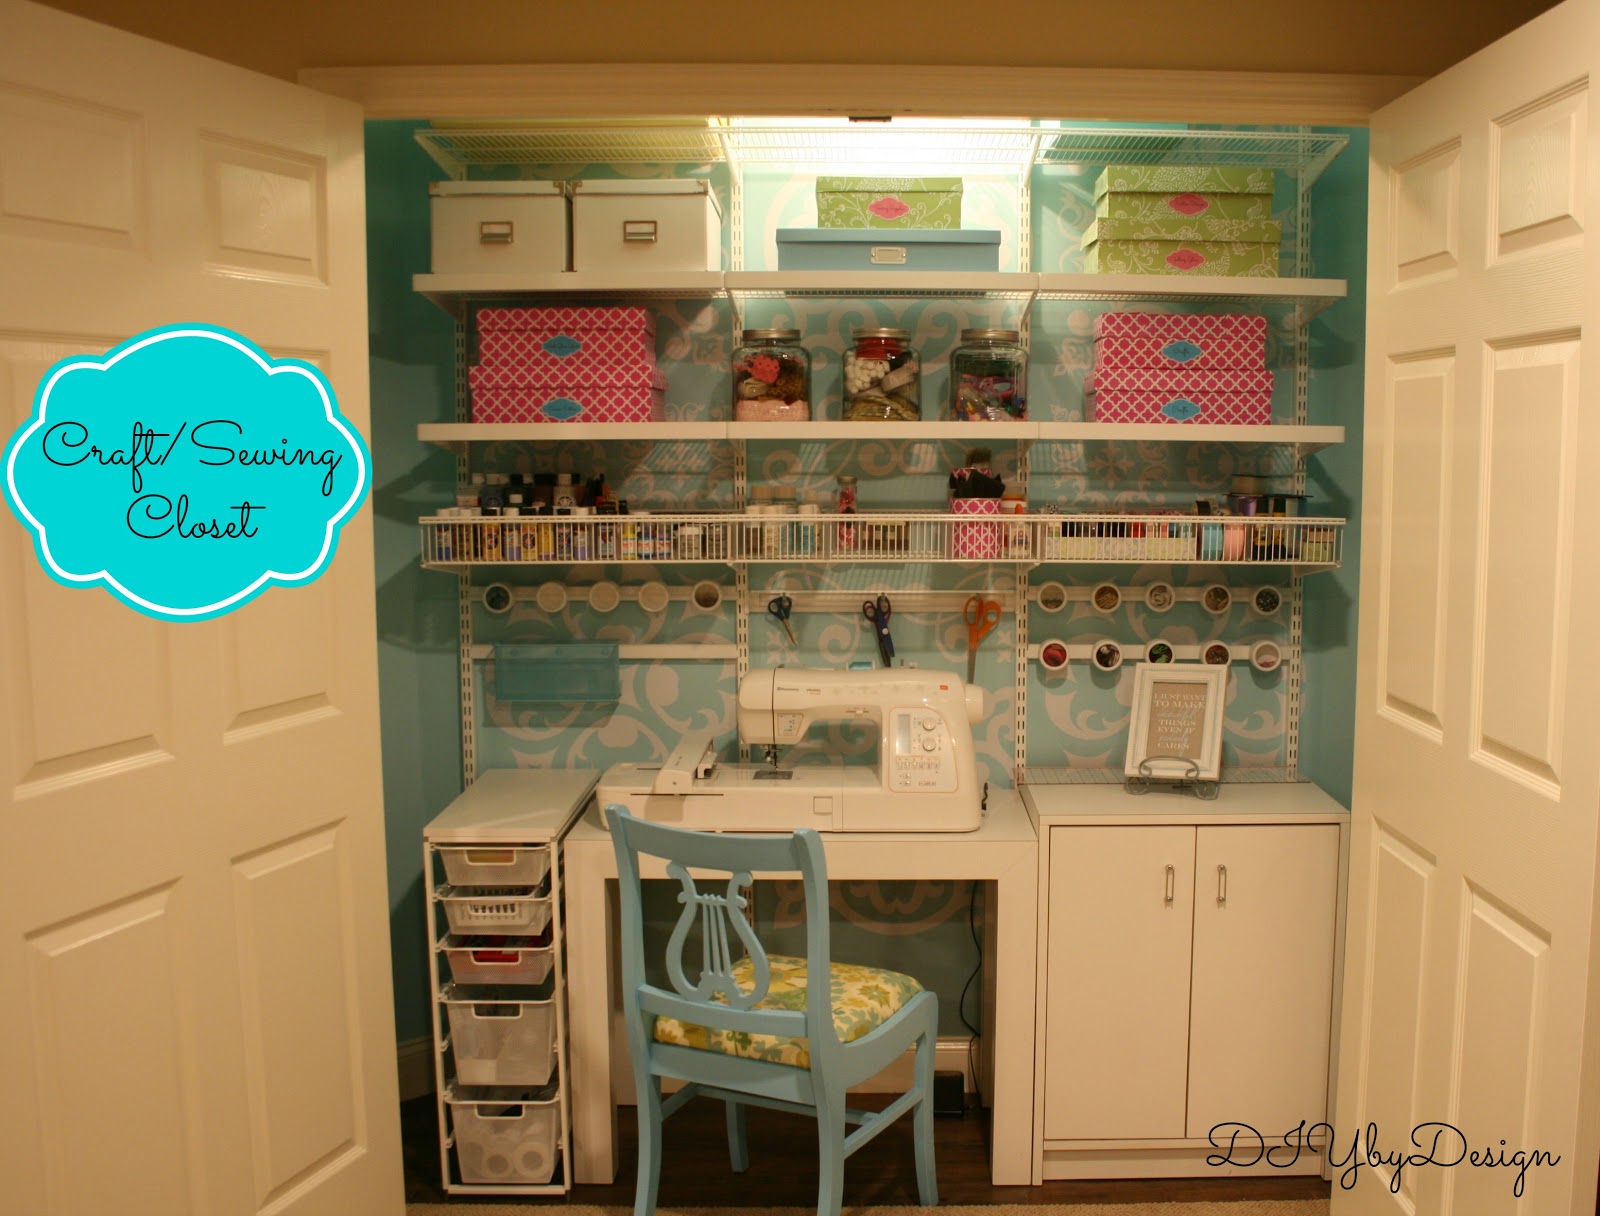
Five Friday Favorites: sewing room inspiration
photo from DIY by Design

I'm lucky enough to have a room now, but I don't think there's a week that goes by that I don't appreciate the fact that I can make a big creative mess, close the door and come back days later and pick up right where I left off.

So here are my 5 favorite sewing room inspirations!  Hopefully you can find a bit of inspiration as well, and make your own space into something that inspires YOU.


#1:  Tasha Noel
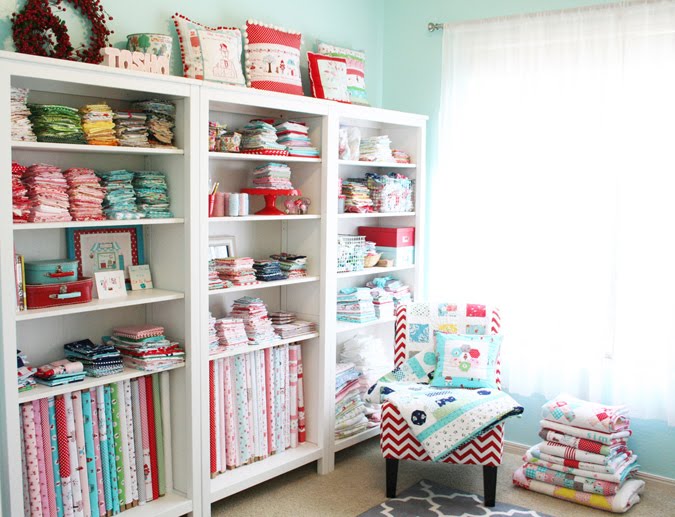
Tasha Noel sewing room inspiration
photo cred Tasha Noel
Here's why I chose this one.  It's gorgeous, yes.  But what I hope to bring to my own space is the brightness, the airy curtains, and how she displays her non-quilt items along the top of her shelves.  Clever!   You can see more of Tasha's room here on her blog.


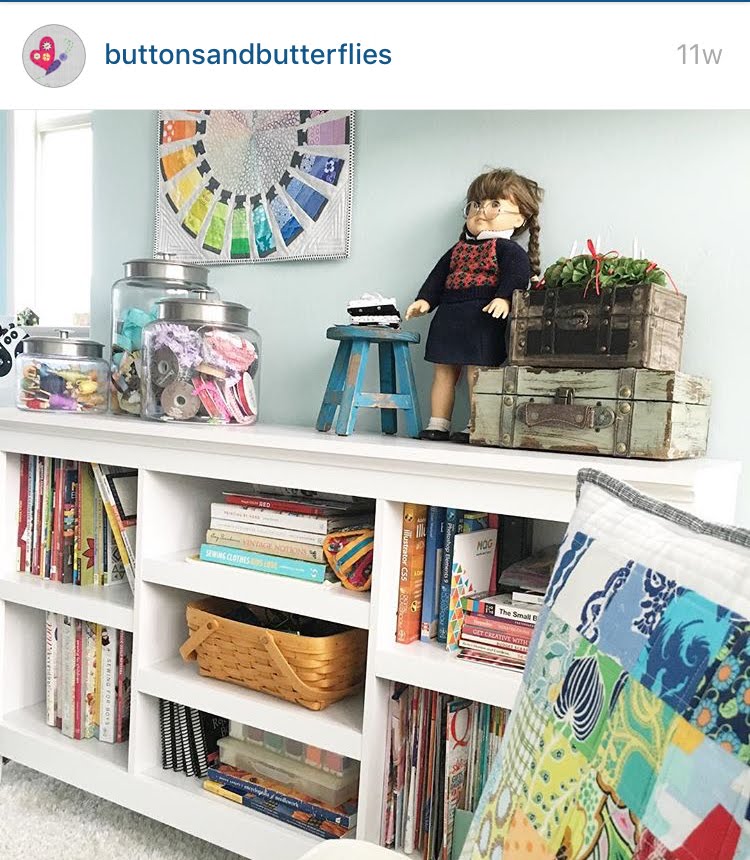
#2:  Buttons and Butterflies

Five Friday Favorites: sewing room inspiration from Buttons and Butterflies
photo from Instagram @buttonsandbutterflies

Yes I grabbed this from Instagram.  It's a great way to find inspiration in all forms.  Heidi (blog: Buttons and Butterflies) recently moved and even more recently remodeled her quilting space.  All of the photos I've seen of her studio are gorgeous, but what draws me to this photo is how she uses those large jars to store pretty items.  This would work for your washi tape collection, ribbons, buttons, colorful zippers....   You can see more of Heidi's space here on her IG account (along with her beautiful quilts!)


#3:  Everyday Celebrations
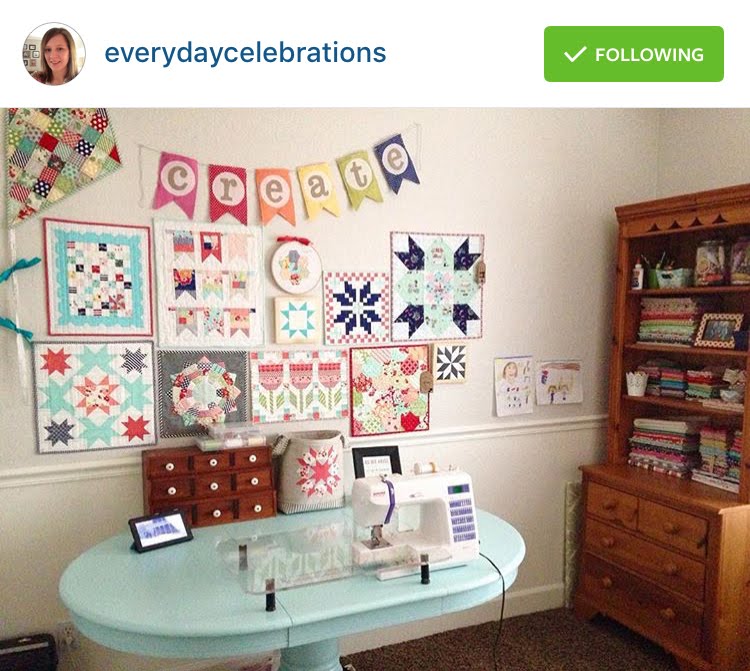
Five Friday Favorites: sewing room inspiration from Everyday Celebrations
photo from Instagram @everydaycelebrations
 
Another screen shot grabbed from Instagram (I'm there a lot).  What inspires me about LeAnne's photo is the color of her table!  Why don't I think to paint a table??  Painting furniture is just really not in my skill set.  But I love how her table brings brightness and charm to her space.  And I'm also inspired by her wall of mini quilts.  I'm trying to add to my mini wall (slowly but surely!)  Follow LeAnne on IG (everydaycelebrations) or here on her blog. 


#4:  Hyacinth Quilt Designs
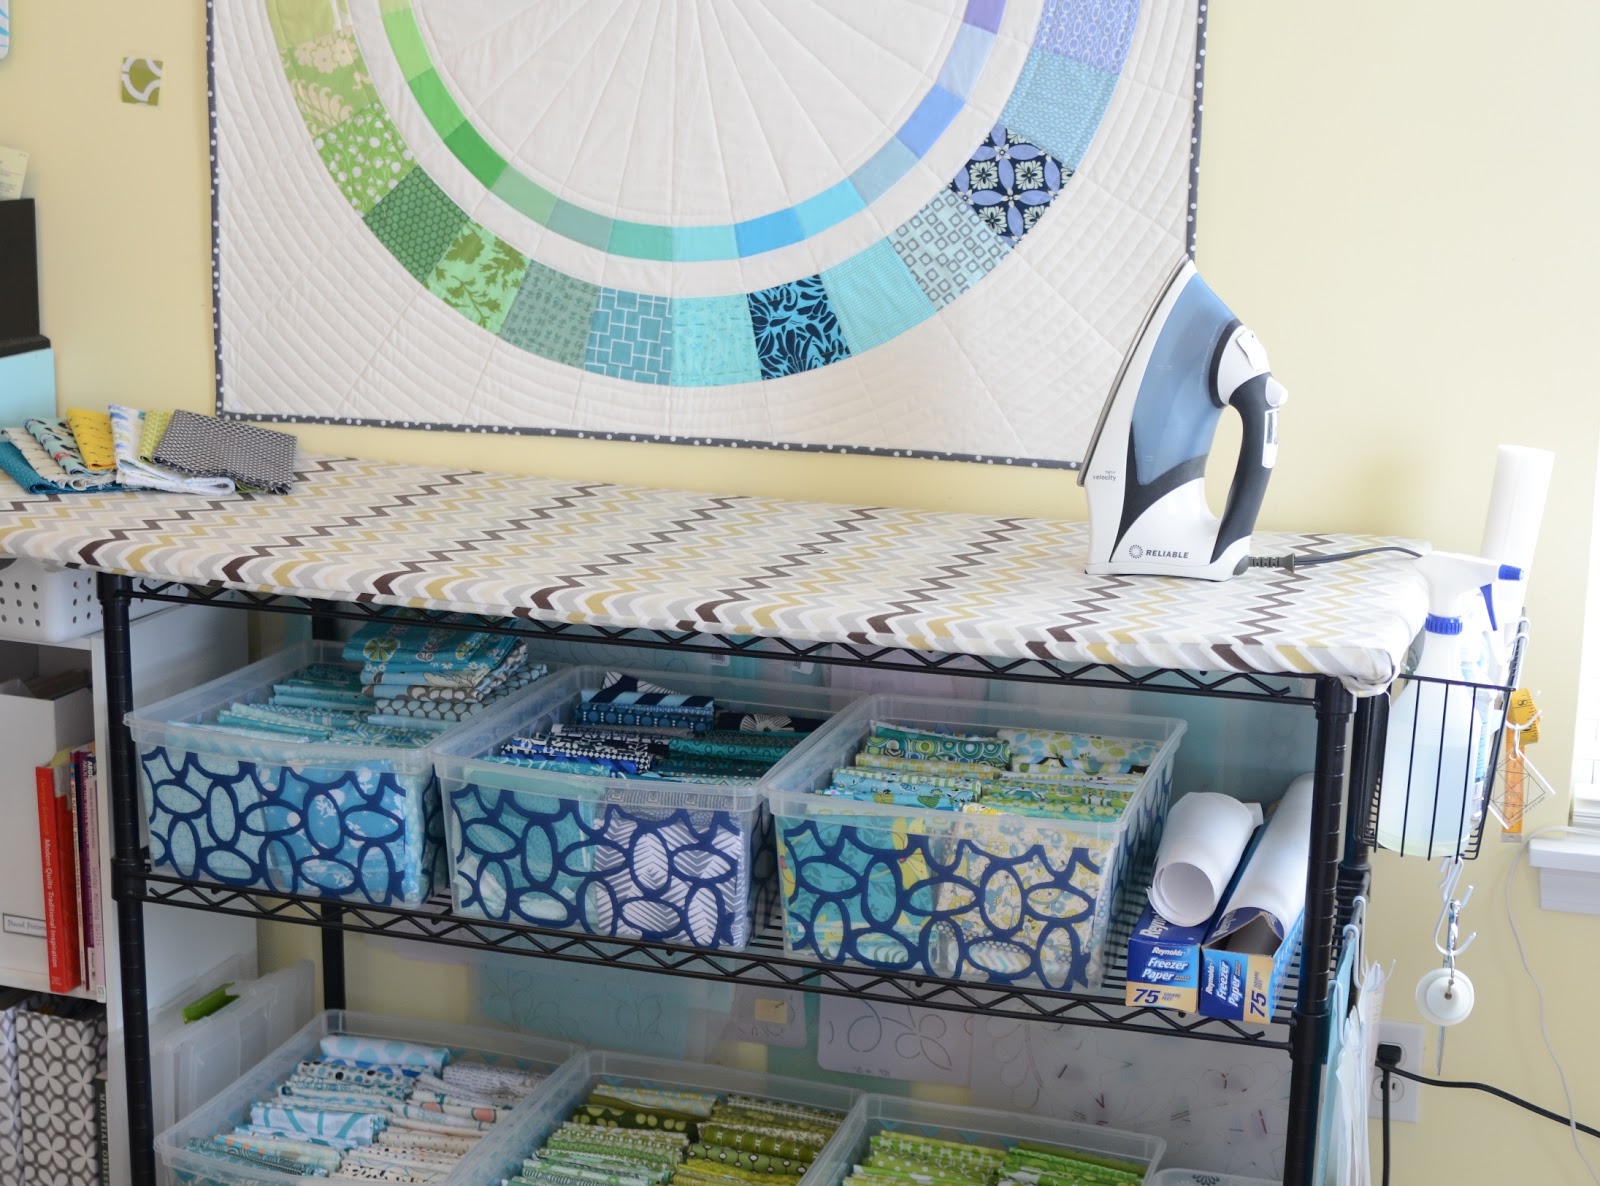
Five Friday Favorites: sewing room inspiration from Hyacinth Quilt Designs
photo from http://hyacinthquiltdesigns.blogspot.com/

I chose this photo as one of my inspirations because of Cindy's pressing station.  How nice would it be to have a longer and wider space to press all of those quilt tops?  And I love that her pressing station has added storage space.  Bonus!  You can see more of Cindy's sewing room on her blog here.  And follow Cindy on Instagram @clammon.


#5:  Angie Brandl
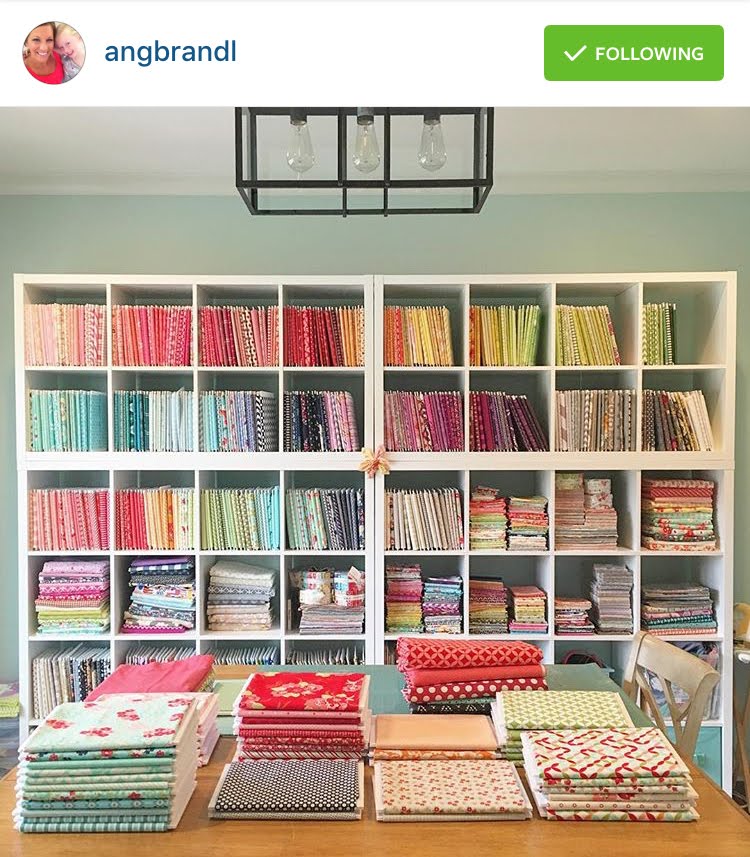
Five Friday Favorites: sewing room inspiration from @angbrandl
photo from Instagram @angbrandl
 
I recently found Angie on Instagram and I don't know much about her.  But this photo of her fabric shelves is AH-MAZ-ING!  I'm including it here on my list because of her organization!  She's wraps her fabric around foam core boards that have been cut down to the same size.  Really clever.  It would take me forever to do this, and I don't have space for these shelves, but this has inspired me to take a second look at how I organize (and store) my fabric.

So there you go!  Just a handful of the sewing room photos that inspire me.

You can see more sewing room photos that inspire me here on my Pinterest board.  What are you inspired by?  What would you like to add to, or change about your sewing space?


Monday, November 23, 2015

Fabric Covered Hexagon Wall Decor

hexagon wall decor 23

As promised – I’m back today to share with you how my weekend project went!  I had found these hexagon shaped cork tiles at my local Target store and thought it would be fun to cover them with some of my current favorite prints and use them to brighten up a bare wall in my quilting room.

fabric covered hexagons 2

It’s super easy project!  Here’s how I did it.  First of all you’ll need a pack of cork board tiles.  One pack comes with 4 tiles. 

Hexagon wall decor 1

You’ll also need a permanent glue stick.  I love this one from Therm O Web because it’s nice and wide, but any permanent glue stick will work.  Or a glue gun would work as well!

Hexagon wall decor 2

I used 4 fat quarters for this project, but you can use scraps as long as they’re at least 14” x 14”.  The fabric I used is from the “Folklore” line designed by Heather Rosas for Camelot Fabrics.

Trim your fabric down so that it extends beyond the hexagon by about 3/4” to 1” around each edge.  It doesn’t have to be perfect.  

Hexagon wall decor 3

Add a line of glue to one edge, fold fabric over, and press.  

Hexagon wall decor 4

My glue held well and dried fairly quickly so I was able to glue the next side immediately.  After you glue the first side, next move to the side directly opposite the first.  Glue that second side down, making sure to pull the fabric tight without stretching.  

Hexagon wall decor 5

Now that you have two sides glued, move to an adjacent side and glue that one.  Miter the corner by folding it as shown in the photo below.  

Hexagon wall decor 6

Continue moving around the hexagon gluing down the sides, mitering the corners, and making sure the fabric is pulled taut.


Hexagon wall decor 8
Repeat to make all four hexagons.  If any of your fabric is directional, just be sure it is aligned the way you prefer before you start gluing. 

Hexagon wall decor 9

The cork tiles came with stickers to use for hanging, but I wasn’t sure how well they would hold, or if they would damage the paint on the wall.  So I bought a pack of these handy Picture Hanging Strips.  They’re a velcro type of adhesive that makes it soooo easy to hang things without leaving holes in the wall, or peeling off paint. 

Hexagon wall decor 10

Because the hexagons are thin and lightweight, I only needed one strip to hang each one. You can see below how low-profile they are.  

Hexagon wall decor 12

Here’s the oh-so-boring wall before…

Hexagon wall decor 11

…and after!  Much better, don’t you think?  I love how they brighten up that spot.  And when I fall in love with a new fabric line I can easily switch out the fabrics!

hexagon wall decor finished


Friday, January 30, 2015

Taking Stock

I’m not much of a New Year’s Resolutions type of girl.  In years past, the thought of setting a few goals that would apply to the entire year was just too overwhelming.  Either I would aim too high in my goals and then never reach them, or reach too low and achieve them by March.  Neither was an effective way of using the whole “resolution” idea, right?  So now my goal writing happens on a weekly basis.  After searching and searching (and testing and trying) I finally found an app/website that helps me keep my to-do list and goals organized.  And I must say that it has helped me tremendously!

WIP stack

It’s called Todoist and it’s an app AND a website – so I can access it from my phone and my computer.  My favorite part about it?  There’s these little check boxes by each item so I still get the satisfaction of checking something off when it’s complete.  So.  Satisfying. 

I also love that I can break down a larger project – say for spring cleaning the house, or writing a new pattern – into smaller, more approachable tasks. 

Here’s what else is great – I can put things in categories.  For instance, I have a “sewing & piecing” category.  So if I set aside an afternoon for some sewing, I refer to that category for the things that need to be done.  And likewise, if I decide I need to sit at the computer one morning and get some design work done, I can take a look at my “design” category to see the design tasks that are waiting their turn.  Pretty nifty. 

WIP stack

Alright.  So I didn’t intend for this blog post to become a commercial for Todoist.  I just wanted to show you my pile of quilts and backings that are waiting their turn to be quilted. 

This week I’ve been making a complete list of my WIPS (works in progress) and stacking them together depending on the state they’re in.  These are all 6 of the quilts & backs that are ready for quilting.  I have another small stack of quilts waiting for their backings.  One quilt needs a binding, and a few quilts are just a rough stack of blocks right now.  It helps me to have projects grouped like that- similar to the categories I use for Todoist.  So now if I decide one day to get some long arm quilting done, the quilts and backings are right there ready to go!

WIP stack

Time to get some of these projects done! How’s your WIP stack coming along?  Do you set quilty goals for yourself?


Monday, April 14, 2014

Queen Sized Mistake(s)


So….. months ago I started a new queen sized quilt for my bed.  It’s been years since I’ve made myself a new bed quilt.  Years I tell you!  Six years to be exact.

Sewing with A Bright Corner

I got everything cut and started chain piecing everything.  Things were really humming along – I was so productive!  Well, I moved on to step 2 of chain piecing and THEN realized that I had cut all of the background pieces wrong.  All 144 of them.  Those were the 144 pieces I chain pieced in step 1.  Ug.  Out of pure frustration, I put everything back into the storage bin and set it aside.  I couldn’t bring myself to even look at it for several weeks.

Last week I pulled the project back out of the closet, determined to finish.  So then I had a dilemma.  Do I unpick 144 seams?  Or do I use those 144 mistakes on another project and start this one over? 

To save my sanity, I started over.  Here’s the new  rectangles ready to be chain pieced to the CORRECT size of background strips. 

Sewing with A Bright Corner

The problem is fixed now and once again, things are moving along nicely!  Lesson learned: Everyone makes mistakes and (yes, I know, I know) measure twice, cut once.

Tuesday, November 19, 2013

Stashing Low Volume Fabrics

 I like to keep a nice variety of low volume fabrics in my stash.  I don’t keep a large stash of them – but just a small cut of many different prints. 

Most of them are 1/4 yard or less, many of them are fat quarters. 

low volume fabric stack

How do I find them?  Oh, here and there.  No really! 

I’ve only purchased one low volume bundle (which IS a great way to gather low vol fabrics!) and the rest were bought a piece at a time as I find them in shops.  Usually as I’m looking for fabric for other projects I’ll take a moment to look through the sale stacks or the bin of fat quarters. 

Buying a low volume stack or bundle is a great way to beef up your LV stash, or start one for that matter.  Amanda from Westwood Acres usually has a few low volume bundles in her shop.  You can also find some here, here and here, and here.

Swapping is also a great way to get a nice variety of fabrics.  I know there have been some low vol swaps in the past – does anyone know of a low volume swap currently taking sign ups?  Maybe we should start one of our own, eh?

stack of low volume fabrics

As far as storing my LV stash goes, I’ve tried two ways.  When I first started really focusing on collecting low volume fabrics I would just add each to the color stack I felt it belonged with – although most of them fell in with the grays and blacks. 

The downside to that is that when I needed to do an entire project that used many low volume prints I had to go through each stack to pull out what I needed.  Ugh!  So after that I just started a new stack on the end of my shelf that was dedicated to just low volume.  That storage method works much better for me. 

low volume charms

So what exactly ARE low volume fabrics and how are they used?  This blog article by Sherri McConnell is a great place to start.

How about some low volume inspiration?  There are so many fantastic quilts and pillows out there that effectively use low vol fabrics.  Here are just some of my favorites!

low volume mosaic

1. Modern Maples Quilt Top Complete!, 2. My low volume version of V&Co's Reverse Hopscotch Quilt, 3. Low Volume Pixelated Heart Baby Quilt, 4. Low volume quilt, 5. Low volume plus quilt, 6. Finished HST Low Volume Quilt (125), 7. FLiQS Quilt Received from Donna, 8. plain spoken low volume quilt, 9. Low Volume Single Girl Quilt, 10. Banderitas, 11. Outer Border Quilting - Marcelle Medallion, 12. Springtime Riot {do. Good Stitches August Quilt}, 13. Friends with Additions Starter Block, 14. mod pop, 15. low volume quilt- full front, 16. Goose Creek for do. Good Stitches

Wednesday, October 23, 2013

Double Sided Minky Blanket


Confession time:  I've been avoiding Minky.  To be honest, I was a little afraid of it.  I’ve heard all the horror stories.  You know – you’ve heard them too.    

But then I started doing display quilts for the Fabric Mill and they have such cute minky – and  minky makes such snugly quilt backs.  So I tried it.  And it wasn’t so bad.  Not bad at all. 

Double sided minky blanket from A Bright Corner

I’ve used minky on a quilt back three times now.  And I love it. 

Then I was asked to make a double sided minky throw.  Woah.  That’s a new one for me.  So I googled some different tutorials, found some good tips and then just dove right in. 

Guess what?  It was easy-peasy (as my kindergartener is fond of saying.)

Double sided minky blanket from A Bright Corner

It was a fast project and now that I’ve done it once, it would be even quicker next time.  And I just have to say, aren’t those little snowmen so cute and cheerful? 

Double sided minky blanket from A Bright Corner

Here are the tutorials I found to be helpful:

I watched this youtube tute first.

I laid out and marked my blanket like this tutorial does.  I like the idea of sewing along a marked line and trimming the seam allowances AFTER.  It was easier than trying to trim everything first.  I also used my walking foot like she recommends. 

This one is also good.

My boys are already anticipating the day when this happy minky throw makes it way home again so they can fight over it use it.

Thursday, October 10, 2013

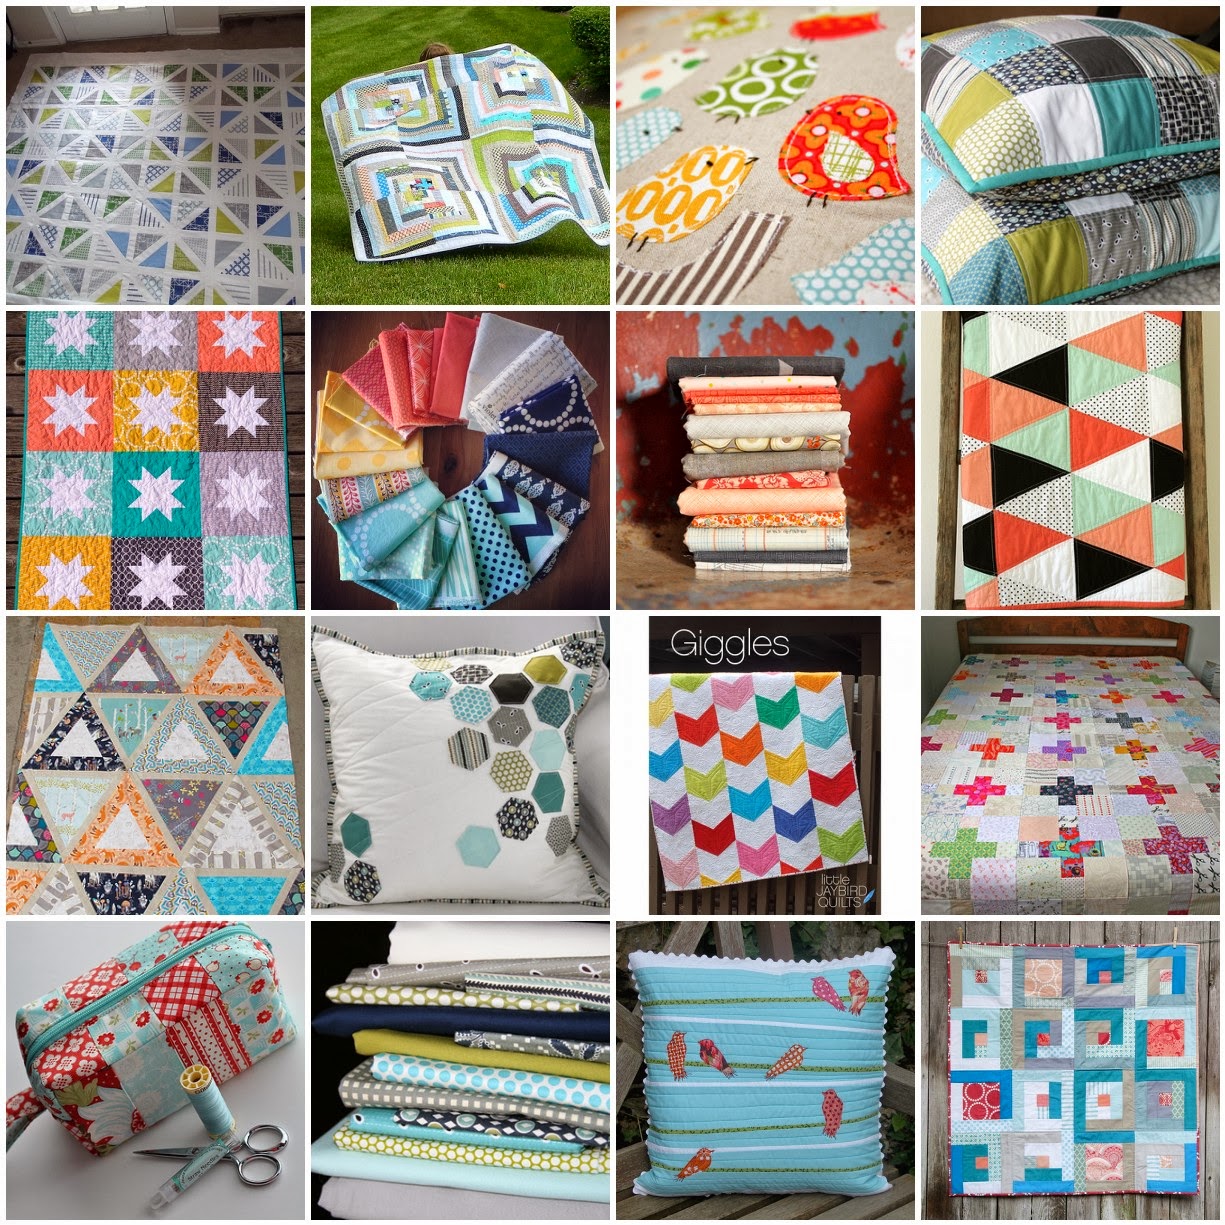
Swap Mosaic

Have you ever used Flickr to make a mosaic?  It's addicting!  Flickr all on it's own is one of my favorite places to gawk.  There are so many amazing photos there.

I'm currently in a swap with our Imagine circle for do.Good Stitches and we were asked to create an inspiration mosaic to help our swap partner gather ideas.  I dug through some of my most favorite photos and compiled them all into a mosaic using Big Huge Labs.  I have to admit it was hard to choose only 16 of my favorites!


Flickr Mosaic


1. Family Picnic Blanket - Modern Lattice Quilt by Whirly Bird Quilts, 2. scrapper's delight, 3. Pillow Swap - A little bird detail, 4. patchwork pillows, 5. Stargazer baby quilt and Sept ALYoF, 6. Potential fabrics for next month's #dogoodstitches quilt. Coral, yellow, aqua, navy, white/grey., 7. Superstar quilt fabric stack, 8. a coral and mint isosceles quilt., 9. Chopsticks for my new niece., 10. hexagon pillow 2, 11. Giggles Baby Quilt, 12. woohoo!, 13. Abby's Treasure Box, 14. hope valley fabric stack, 15. original birds on a wire, 16. Coral and Aqua Quilt Front

(To see any of the photos in more detail simply click on the numbered link above.)

Monday, September 16, 2013

Looking Ahead

 I have quite a busy week ahead of me.  My to-do list is quite long – well, to be honest I don’t have one well organized to-do list like I probably should.  Instead I have like 15 scraps of paper scattered about with little notes to myself on them.  What’s on my list?  Among other things- printing patterns, finishing a display quilt for Fabric Mill, hair appointment, dentist appointments for the family, buying jeans for kids, a trip to Costco, oh and prepping for this:

SS13button

So looking forward to this weekend!  I missed the last two Sewing Summits and I’m excited to finally be able to go.  Who else will be there this weekend?

Also on my to-do list this week:  Put away this stack of quilts!  As I walk upstairs this is my view:

stack of quilts

This is a half wall that is between our stairs and the entryway.  I have these five quilts laying here waiting for their photo shoot.  Some of them I’ve already photographed but I want to make sure I have enough good pics before I fold up the quilt and put it away.  My family is so patient with me and my stacks of quilts everywhere. 

Alright – off I go back to work!


Thursday, November 8, 2012

Spotted


Look what Heather recently finished!

IMG_0251

She used my strip tube tutorial and the fabric is Pure from Sweetwater.  I love the blues and browns together.  I think I need to track down a jelly roll of Pure and make one of these for me!  The quilting on this quilt is great – go here and see her other photos.  She has several that really show off the quilting. 

Thanks for letting me show off your quilt Heather!


Wednesday, July 4, 2012

Star Table Runner

Back in June I told you that I was doing some patriotic sewing and then I never showed you any more – sorry!  Life just got a little busy!

These stars and this binding:

patriotic sewing

…became this Star Table Runner:

star table runner


Does it look familiar?  I made a Christmas version back in December:

christmas table runner

These table runners are a quick and easy project – gotta love that!


patriotic table runner

My local quilt shop is now selling kits for these table runners.  The kit includes the pattern and everything you need except the batting.  The table runner finishes at 12” x 40”  -  which fits so nicely on my bookcase!

The kits are gone now, but I'm considering doing a Christmas version through my etsy shop.  Email me if you are interested in a Christmas Star Table Runner!  (abrightcorner [at] gmail [dot] com)

star table runner kits

Happy 4th of July to all of my US friends!


Monday, May 28, 2012

Happy Memorial Day and Giveaway Winners


Happy Memorial Day to all of my US friends! 

flag


So far this weekend I’ve been doing some quilting.  A lot of quilting.  Last Thursday I had a stack of six quilts ready to be quilted.  Three of them are done now, one of them is even bound and in the wash already.  I’ll show you tomorrow.


quilting ruby


I need to announce the winners of the giveaway from last week!  The winner of the 6 fat quarters and Unlinked pattern is…


giveaway winner

And for the pattern winners…

giveaway pattern winner 1


giveaway pattern winner 2

Yes, I know I said I would giveaway one pattern but I changed my mind.  I’m pretty good at changing my mind.  Actually because I enjoyed so many of your kind/interesting/generous/funny comments I ended up giving away five patterns.  The other winners have been contacted already. 

As a thank you to all of you for your comments and your participation in the Sew Mama Sew Giveaway Day, my pdf patterns will all be 35% off through tonight (Monday 5/28/11) at midnight.  That makes each pattern just over $5 each. Just enter the  code “giveaway” when checking out.  (This discount only applies to the pdf patterns in my shop, and not the ones listed on etsy - sorry!)

Again, thank you!  I look forward to the next SMS Giveaway Day!

--Andy

Sunday, May 6, 2012

Testing Butterflies

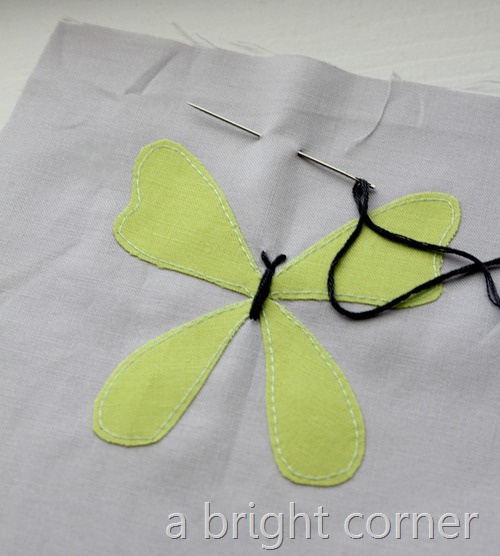
test butterfly


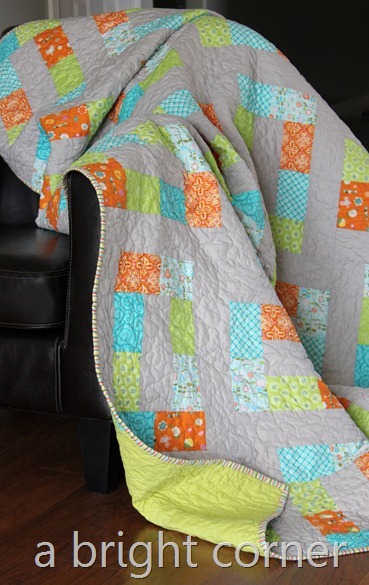
This past weekend I was testing out some raw-edged applique butterflies.  She’s sweet, isn’t she?  A customer asked for a crib bumper to match this quilt and wanted a few butterflies added in. 


unlinked brights 6


What did you do this weekend? 



Thursday, April 26, 2012

Yellow and Gray

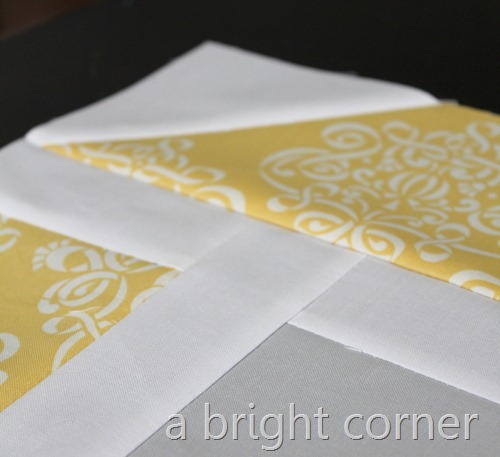
playing with yellow and gray


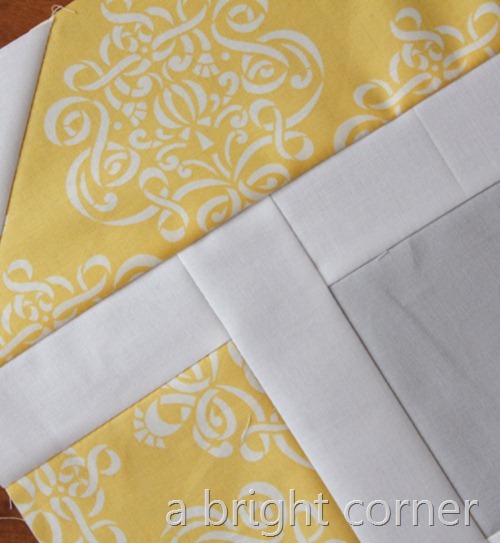
This is a peek at my first tester block for a new pattern.  The tester block came out perfectly (whew!)


I really am not a big fan of the color yellow, but this print got me. 


playing with yellow and gray 2


Related Posts Plugin for WordPress, Blogger...